CLICK HERE FOR FREE BLOGGER TEMPLATES, LINK BUTTONS AND MORE! »

Pages

Saturday, January 15, 2011

Summer Is Here

Hi there bloggers, just thought I would share with you my latest challenge entry which I entered for The Greeting Farm, Club Anya, Saturday Sketch challenge.  Here is the copy of the sketch:


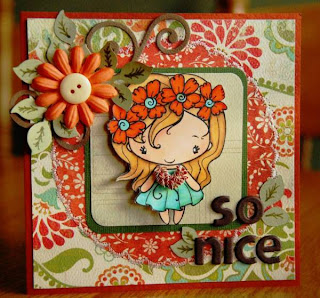
And as usual here is my interpretation.  Now I know most of you are still experiencing snow and cold, but here in OZ we have a heatwave as we are in the middle of our summer.  Therefore I felt like making a summer inspired card.
Isn't she cute!!! I love this stamp.  She is one of the Wild Sprouts" from the Greeting Farm and she is aptly named "Summer".  She is only available in the roll call kit.  I love her!!!

This card also includes papers from DCWV papers from their citrus collection (including co-ordinating cardstock) and some ribbons and flowers from my stash.  The image has been coloured using copic markers. Magnolia's picket fence doohickey has been used for the little fence and the die cut and rubbon used inside the card are from Kaiser's "Seaside" Collection.  Fortunately I only just made the submission deadline by the skin of my teeth!!  As a result we are now onto a new sketch!!!.....C'mon Tash keep up, keep up.

Friday, January 14, 2011

Be There Or Be Square

Hi bloggers, just a quick shout out to advise everyone that one of my favourite stamp companies is having a Valentine Blog Hop on 28th January.  Jump over to Tickled Pink's blog to check out the Ultra Awesome Prize.  I will definitely be there.  Hope you will be there too. 


In the meantime I am busy working away on some last minute challenge creations.  I hope to post some new one's up soon.  Cheers :-)

Tuesday, January 11, 2011

Doesn't Everyone Celebrate Christmas In July Like This?

Hi there bloggers, back again with yet another challenge entry.  This time it is for All That Scraps Magnolia Blog challenge # 5 themed "Winter Where You Live"  well I don't know about the rest of the world, but for us having lived overseas when I was younger, we still celebrate Christmas in July.  It is the only time we can have a "European" type of Christmas as during December the weather is too hot.  You know the kind where you sing carols around the fire and drink mulled wine or hot buttered rum and eggnog and eat warm Christmas pudding with brandied custard....YUMMMMM!! Anyway, this is my entry:

For this card, I made my own shadow box out of chipboard.  The papers used are from Kaiser's "Tis The Season" collection.  I have also stamped and embossed the papers including the sentiment using various Darkroom Door stamps.  The tree, fireplace, fire, ornaments and Tilda stamp are all from Magnolia and all have been coloured using copic ciao markers before applying Kindy Glitz in "Red and Antique Silver".  I hope you like it.  Ciao for now.

"I'm Dreaming of a White Christmas"

Hi bloggers, today I am ready to show you a challenge entry I have been working on over the past 2 days.  It is for Challenge #49 at Drunken Stampers.  The challenge theme is "whiteout".  The first thing that came to my mind was a  white Christmas.  I know Christmas is now over and everyone (including myself to be honest) is over seeing or doing Christmas cards, however, I could not think of anything more white or more sparkly than a white Christmas snow globe card.  Now I can't take credit for the idea as I saw it a little while ago in "Card Making with Paper Sculpture magazine (ed # 2).  But I think that I have adapted it and played with it enough to make it my own.  So here it is:


I have decided to keep this card for this years Christmas as a very special card for my mum, who has a very elegant theme of white and silver in her formal lounge.  I think she will love it.   


Well that is it for me for this evening/morning as I have been up all night trying to finish this since I have guests arriving tomorrow and I have to go to the airport today to pick up my daughter.  So till next time, take care and have fun crafting.


Monday, January 10, 2011

Welcome Home Little One

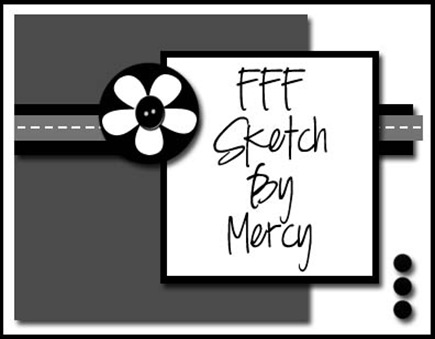
Hi bloggers, I am back again with another entry for a challenge.  This time it is for the Greeting Farm's Farm Fresh Friday Sketch which has been prepared by Mercy Kerin.  I took the opportunity to create a card for my daughter who has been away with her father for the past 2 weeks.  This is the sketch that Mercy has set for us:

And as usual, this is my interpretation:

For this card I have used Bazzil cardstock in a cream colour. Paper from Kaisercraf'ts Hippie Girl collection. The stamp is Fluer Anya from TGF (isn't she cute?).  Some lace, ribbon, flowers, key charm and buttons from my stash.  The ticket is a digi that I got from Bizzy Bec's and I stamped the sentiment using a combination of words from Darkroom Door's "All Occassions" set  and TCP Studio's "So Delish" collection stamp set and distressed the ticket using distress inks (antique linen, spun sugar, tumbled glass).  Anya was coloured in using copics colours #E50, E51, E53, E31, E33, E35, BG10, R02, RV000, YG03, C1, Y11.  I made a mask for my little Anya by stamping her image again, cutting it out and covering the coloured stamp, affixing it with a little removable tape.  I then stamped the script (Tim Holtz) over her using distress in in "Tea Dye".  I then, whilst the mask is still on, used my distressing tool to apply distress inks (spun sugar, tumbled glass and shabby shutters) around the image.  I then further distressed the edge with a dauber using shabby shutters.  I then stamped a sheet of vellum with Kaisers "Sheet Music" in white ink before embossing the image with white powder.  I distressed the sides by tearing it to the adequate size. I finished my piece by attaching some pearls in mint green (also from Kaisercrafts) and applying "crystalina" Kindy Glitz to the edges of the paper, the flowers, Anya etc.  It think my little one will love this creation.  Lucky for me she loves anything I make her.


Cat In The Hat

Not THAT cat in the hat but a cat in a hat in any case.  I am back with an entry for another couple of challenges.  I recently made some purchases from Pink Cat Studio and whilst everything was fine with my order, one of the plates I received was the incorrect one.  I emailed the lovely Melissa to advise her of the error so that it could get corrected.  Melissa very kindly and promptly sent me the correct stamp plate but also generously allowed me to keep the also very cute incorrect stamp plate.  I have been sooooo busy over the Christmas period that I had not really had a chance to drop her a line of thanks, which I was so ashamed of.  So yesterday when I was looking at my long list of challenges I figured I would make Melissa a thank you card incorporating not only one of her stamps but some of my challenge criteria's.  As luck would have it one of my challenges is being hosted by Pink Cat Studio and could not be any more fitting.  The challenges that I am entering with the following card are: Friday Sketchers Sketch #136, Sunday with Chrissy Challenge #13 whose theme is "Ribbons" and Crazy4ChallengesC4C69 who had a colour challenge this week based on this picture:


The Sketch challenge set by Friday Sketchers was this one:

And here.......is my interpretation!  
Dah Dah!


Ok, so not the best of photo's once again I apologize for my terrible photography skills (or lack there of).  

For this card I used a pearlized cardstock for the base, some lace, ribbon and a "made with love" charm from my stash.  The stamp is of course from Pink Cat Studio (Cat Plate 1) and has been coloured using copic markers, C1, C3, C5, C7, V04, YR02, YG03, RV000, RV02 and RV04.  I also thought to attach a little flower to her hat to add a little more interest.  The "thank u" sentiment is from a stamp set from Friskars which matches their many punches. For the inside of the card I made a heart shape out of chipboard, sprayed it with glue adhesive and sprinkled with pink glitter.  I cut a slightly larger heart shape to mount it on and glittered both edges with Kindy Glitz "Dusty Rose" and "Antique Silver".  I the cut the edge of a doily and crinkled and glues it to the back of the heart shape to keep the colour consistent throughout.  I then used some "Fundamentals" alpha stickers on the heart for the inside sentiment.  That's pretty much it.  
I later added the two little 3D cat paws to the front of the card, but I am still not sure whether I was pleased with the result or whether there was just too much going on.  What do you think? I would really appreciate any feedback.  Thanks.

Sunday, January 9, 2011

Mahjong Madness

Hi there bloggers, good to be back again however I must tell you I am well and truly stuffed!!!  Quite literally.  Tonight was our Mahjong Club's End of Year Dinner (when I say club I mean, me, my mum, my cousin & my auntie).  Hahaha yeah I know its a little late but we were all too busy prior to Chrissy.  

We try to get together once a fortnight to play Mahjong.  We alternate venue between each others home and the night involves a  nice meal and playing usually till 1 or 2 am.  At the end of the night whoever comes in last pays $4 into the kitty, 3rd pays $3.00, 2nd $2.00 and 1st pays $1.  We only collect $10.00 each night we play but we didn't want to make it too expensive or too much about money and found this works well for us.  

Anyway.... we decided that for our first time we would go to the local League's Club we are members and as members you get a free ticket to their buffet upon renewal which is in the month of your birthday.  Because two of us have only just celebrated our birthday's we had two free tickets, so since our kitty was small we thought this was the best way to take full advantage of what we had.  WELL, I have never been to the all you can eat buffet there before (actually, I was impressed with the quality of the food, it really was great) but the amount of food that was available to choose between was unbelievable.  I have never seen such a wide selection of foods.  Needless to say we all ate very heartily and had a great time.  We then ended up at my mother's and my house for our first Mahjong Challenge for the year.  Whooo hoooo I came 2nd today.  Believe me this is a vast improvement for I usually come in either 3rd or 4th.  

So our night is over, everyone has gone home or in mums case to bed and its time for me to attend to completing a few more challenges.  Back again soon with another entry.

Saturday, January 8, 2011

Distressing, With Copics?

Hi bloggers, I know I have gone a little bit mad blogging today.  I am definitely on track with my resolutions then aren't I?  Anyway..... don't you just looooove the look of artwork that's been coloured using distress inks?  I have recently learnt that this is referred to as "Scandinavian Style".  Well apparently you can achieve this look using copics.  Yes, you have heard it correctly and if you would like to know how to do it check out Suzanne J Dean's you tube tutorial on how to do it.  Guarantee you will love it.  Now the whole tutorial carries over 4 video's so make sure you see them all.


Well I was inspired and thought I would give it a try.  So here is my interpretation:

Not quite perfect, I think I need more practice but not bad for a first try I think.  I don't have all the pen's that Suzanne uses in her tutorial so I am having to experiment to find the right colours to achieve the desired effect. I think the face and arm are a little dark but perhaps I will do better next time.  Give it a go though it's always great to try something new.  Till next time.  Happy Stampin. :-) 

Friday, January 7, 2011

Stamp Storage - Tips and Suggestions

Hi all, yesterday over at The Greeting Farm new designer Sari Hanninen (who is one of my favourite card makers) shares her tips for how she stores her Greetting Farm stamps.  I must say it got me thinking about how other people store their stamps and other craft items and once again reflect on my own area.  It would be great to get some suggestions and feedback from others who have been working their craft room and craft for some time now. Check our Sari's suggestion in her you tube video below.


As for myself, I am currently in the process of setting up a craft room. I am lucky enough to have a room under the house which will be fitted out for this purpose. Whilst it still needs to be cleared out, painted, furnished and then set up it would be great to start with the right type of storage solutions.   Now I thought this was probably a good time to share what my space currently looks like.  It is probably best done on a you tube video but since I don't know how to operate my camera in video mode or edit it (that will have to wait until I have had some time to play with it) you had better prepare yourselves for a long post.  

At the moment I am surrounded by all my craft bits and bobs in my bedroom! I have bags and bags and boxes and boxes of things here there and everywhere.  Pretty pitiful really.  Notice the child sized table and the bags and bags and boxes all piled underneath the table and chair!


My stamps however, are mainly stored in one of two bags. In one I keep all my general design stamps, such as Dark Room Door, Kaisercraft, Tim Holtz etc.  In the other I keep all my character type stamps such as The Greeting Farm (of course...my favourite) and Magnolia, Kraftin Kimmie, Whiff of Joy, CC Designs etc... 


My character bag contains numerous zip lock bags which are then labeled according to the stamp company and the category or release that each stamp falls under they fall into under that. For example I have one zip lock bag for all my Greeting Farm Creep Crew stamps another for all my Greeting Farm Wild Sprouts etc. Whilst all my kindy glitz, stickles, embossing powders and inks and glimmermist are confined to another bag.  As you can see it is a real mess and can get very frustrating when I can't find what I am looking for.  While this system for the most part works ok at the moment given my circumstances it is a bit tedious, not to mention time consuming, and messy every time I need to fetch a stamp or other item. I also don't have a set work area so I have to work around the coffee table which is very squishy. I really can't wait until it is all finished and done! More importantly I can wait till I can share the result in my new work space with you all.  Thanks for staying with me and don't forget if you have any suggestions, please share them with me.  I am in desperate need of help. Bye for now.


Challenge Entry

Well here is my entry for the TGF's Monday Mania Challenge.  This week's challenge is a sketch challenge which was inspired by the this card by one of The Greeting Farm members who goes by the name of "Dictionary".  Its a really cute card.


And here is my take of the sketch.  


You will have to excuse my photography, I am not yet very good at taking these types of photo's.  If anyone has some tips on taking good photo's of your projects I would really appreciate it.  

For this card I have used Bazzil Cardstock, TGF Angel Anya stamp, some odd ribbons and flowers from my stash, a random rub-on from my stash and butterfly paper from DCWV's "Garden Party" Stack.  Copics used include numbers E50,E51,E53,C1,BG10,V000,R20,R02,E31,E33 and E35.  Kindy Glitz in "Crystalina" was also used.  To make my card, I created a scalloped border around the butterfly paper by tearing paper along a "Fiskars" template which includes a scalloped edge ruler (I know, sad, I don't have any Spellbinder dies YET!!) and tearing and gluing the strips down so they just peep out from behind my background paper.  I distressed the edges of my paper using a distressing tool and ranger distress inks in walnut before sewing the paper to the card with my sewing machine.  I cut the circles using the same Fiskars template. The doily was distressed with distress inks in walnut and spun sugar and practically everything else was distressed using walnut distress ink.  I loooooove my distress inks.  That's pretty much it.

Now because one of my resolutions is to enter as many challenges as I can I am going to enter this card into a couple of other challenges.  These other sites include: Flutterby Wednesday's Challenge #136 (include a butterfly, angel or fair) and Cute Cards Thursday Challenge #146 whose theme is "Out With The Old" I used some of my old paper and ribbons as well as a stamp I had not yet got around to using.  There are many talented entries and even more talented Designers so be sure to check them out.  
Related Posts Plugin for WordPress, Blogger...